

If you’re new to Snowflake and you need to mirror a Snowflake database in Microsoft Fabric, where do you begin? The steps are straightforward enough, but when trying something new, I often get tripped up by the basics. In this case, the configuration screen for mirroring. The documentation tells us to simply enter the server and warehouse, and provides some helpful information on where to find the details, but I prefer step by step instructions with pictures. If you do, too, then this post is for you.
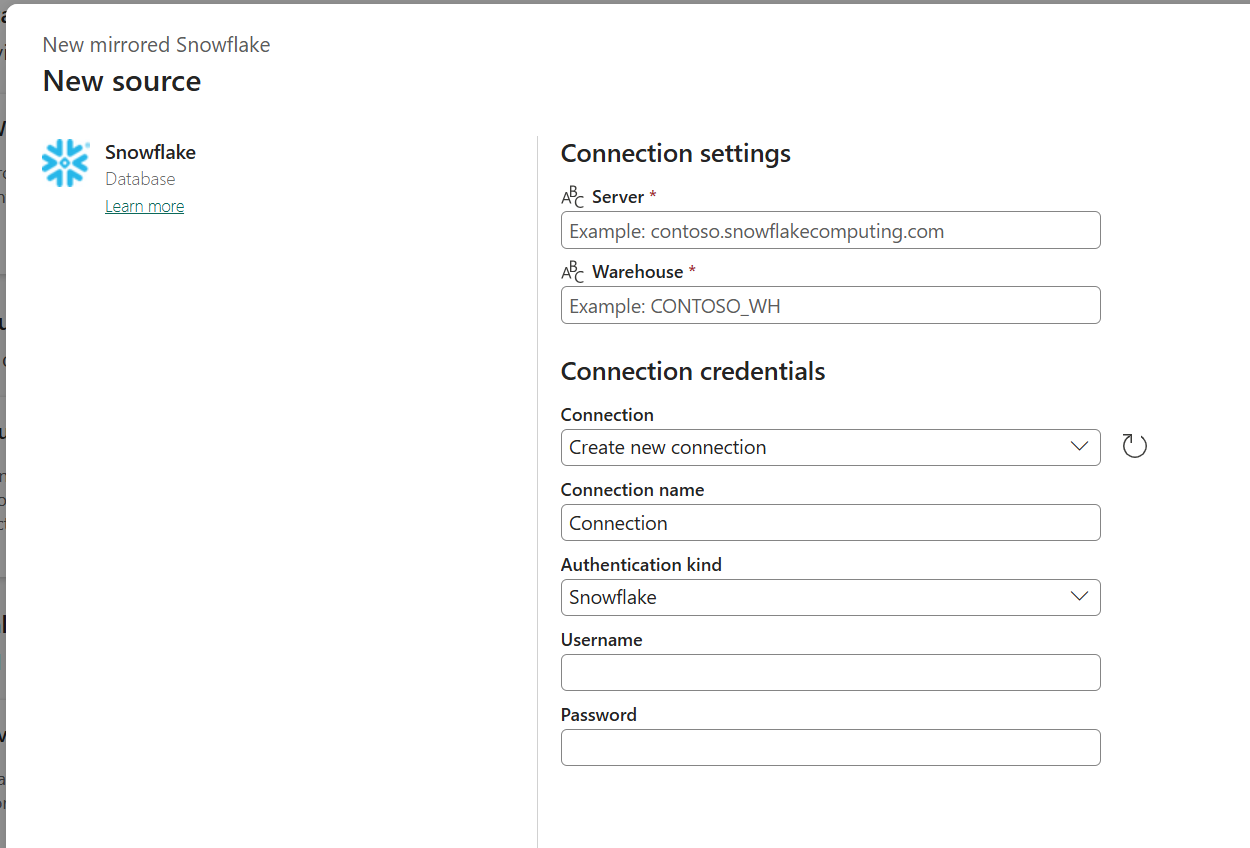
Server
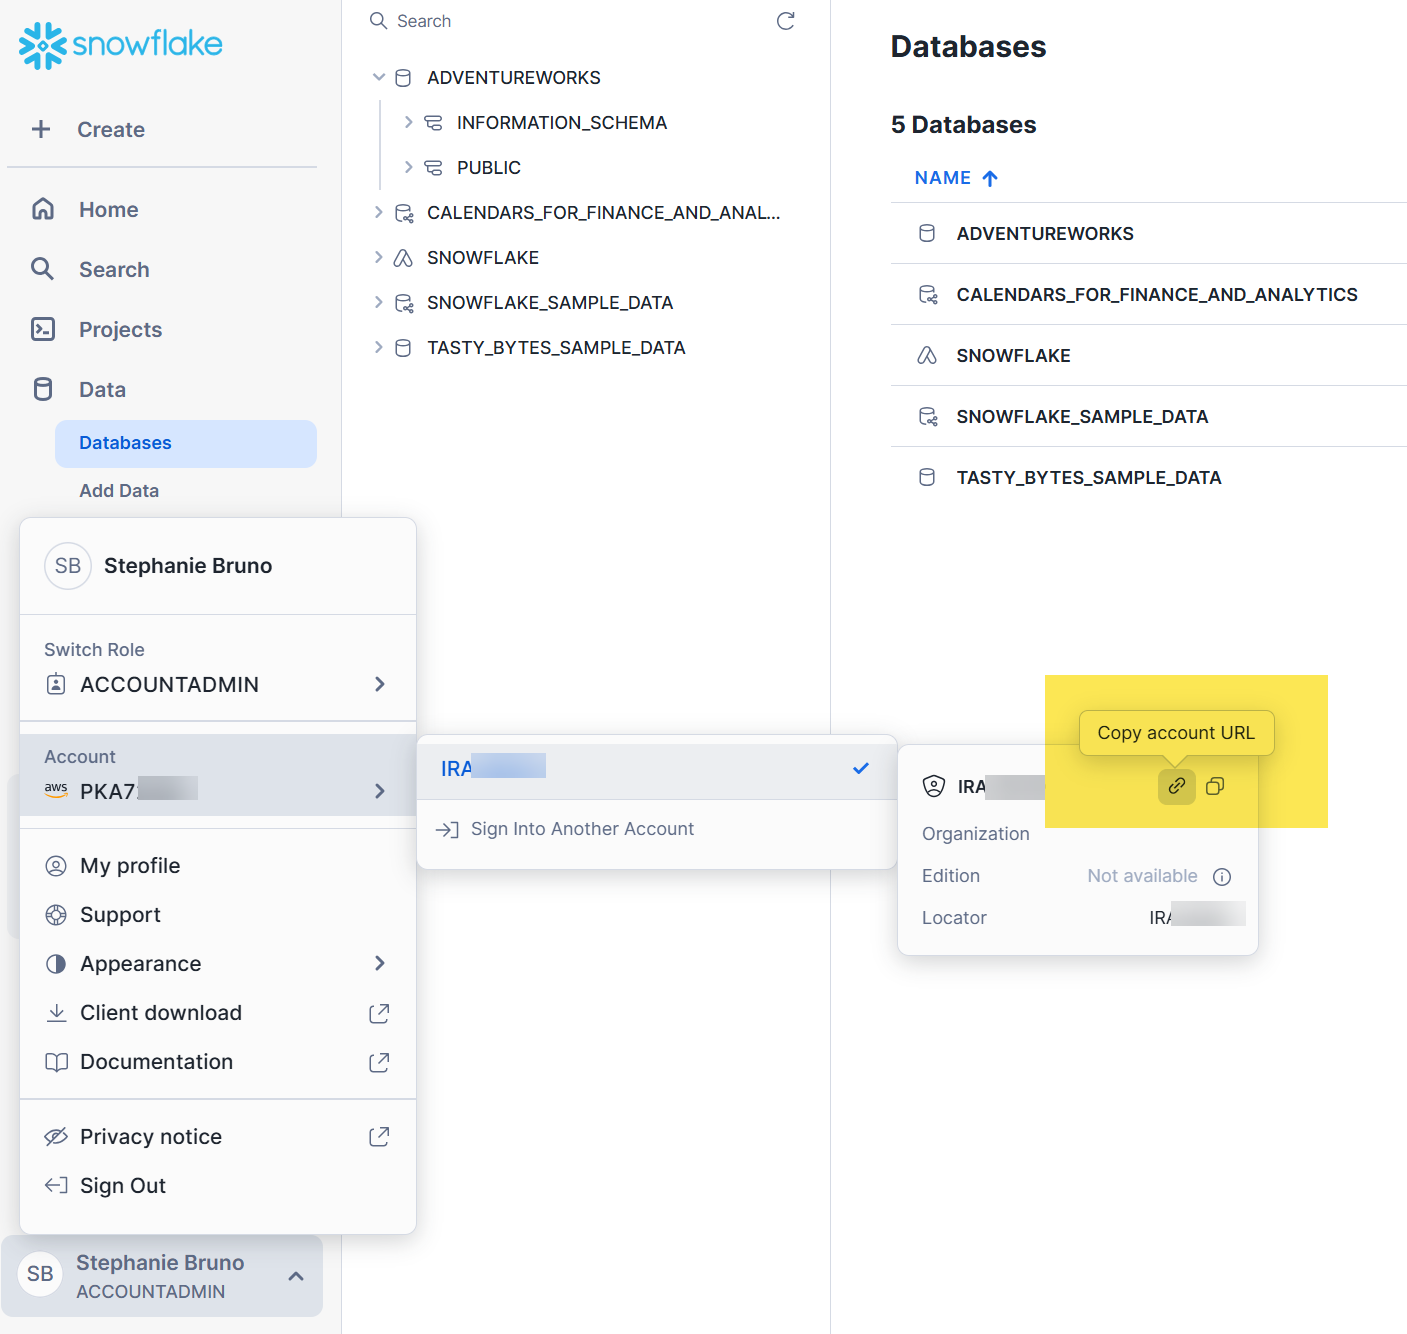
To find the value you’ll need for the Server, log in to Snowflake, and click on your account on the bottom left of the screen. From there you can hover over the account and there will be a little button to copy the account URL. The copied value, minus “https://” is your server. In the case below, the copied value is “https://ira99999.east-us-2.azure.snowflakecomputing.com” so the value to enter for the server is “ira99999.east-us-2.azure.snowflakecomputing.com”
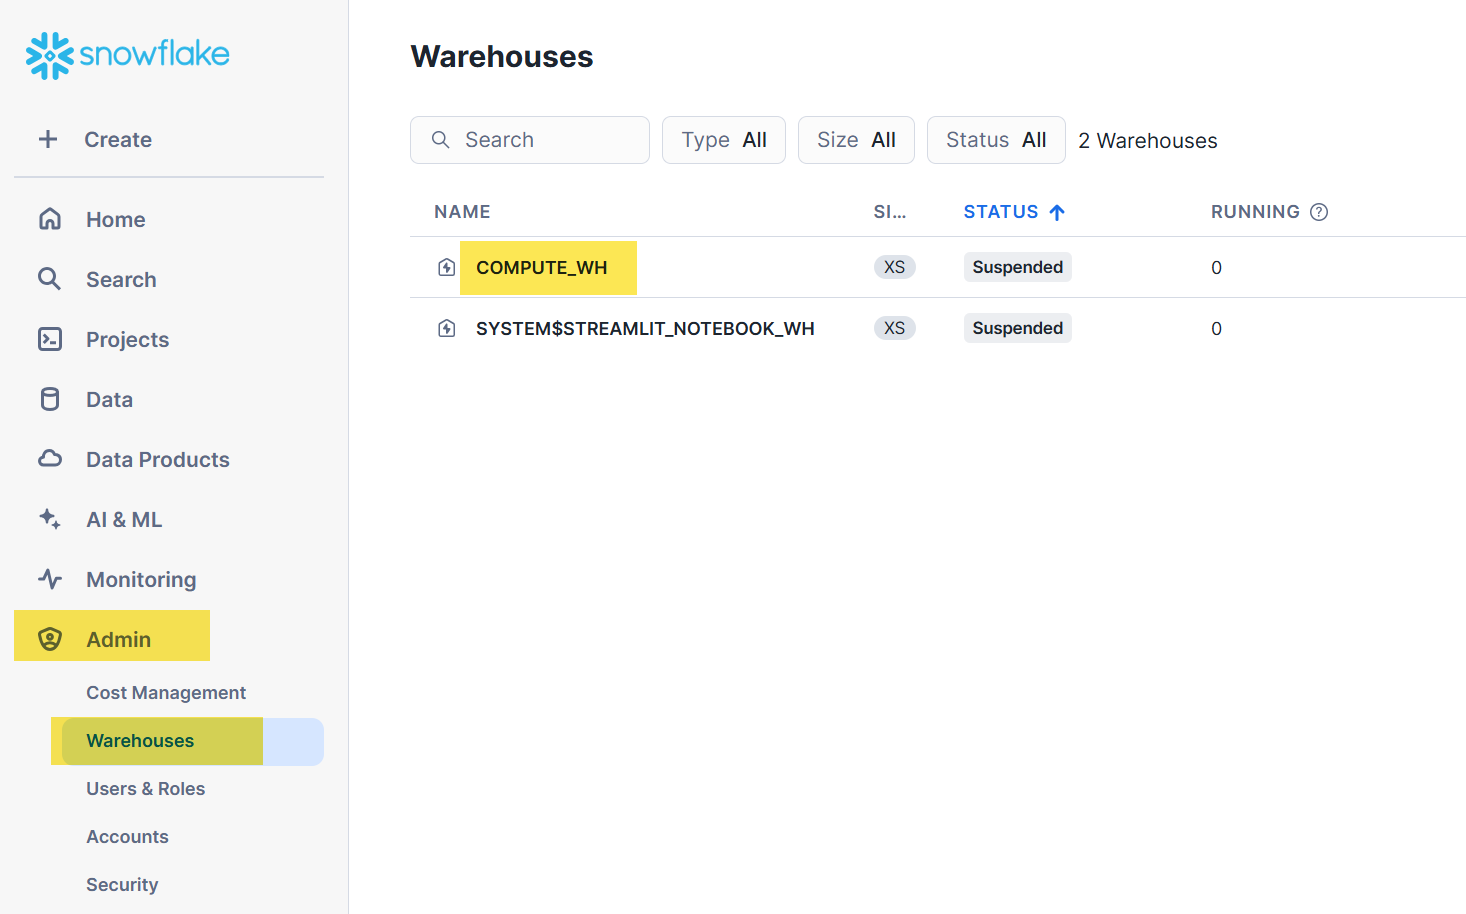
Warehouse
You can find the warehouses available under the Admin menu. Go to Admin, Warehouses, and you’ll see your list.
Database
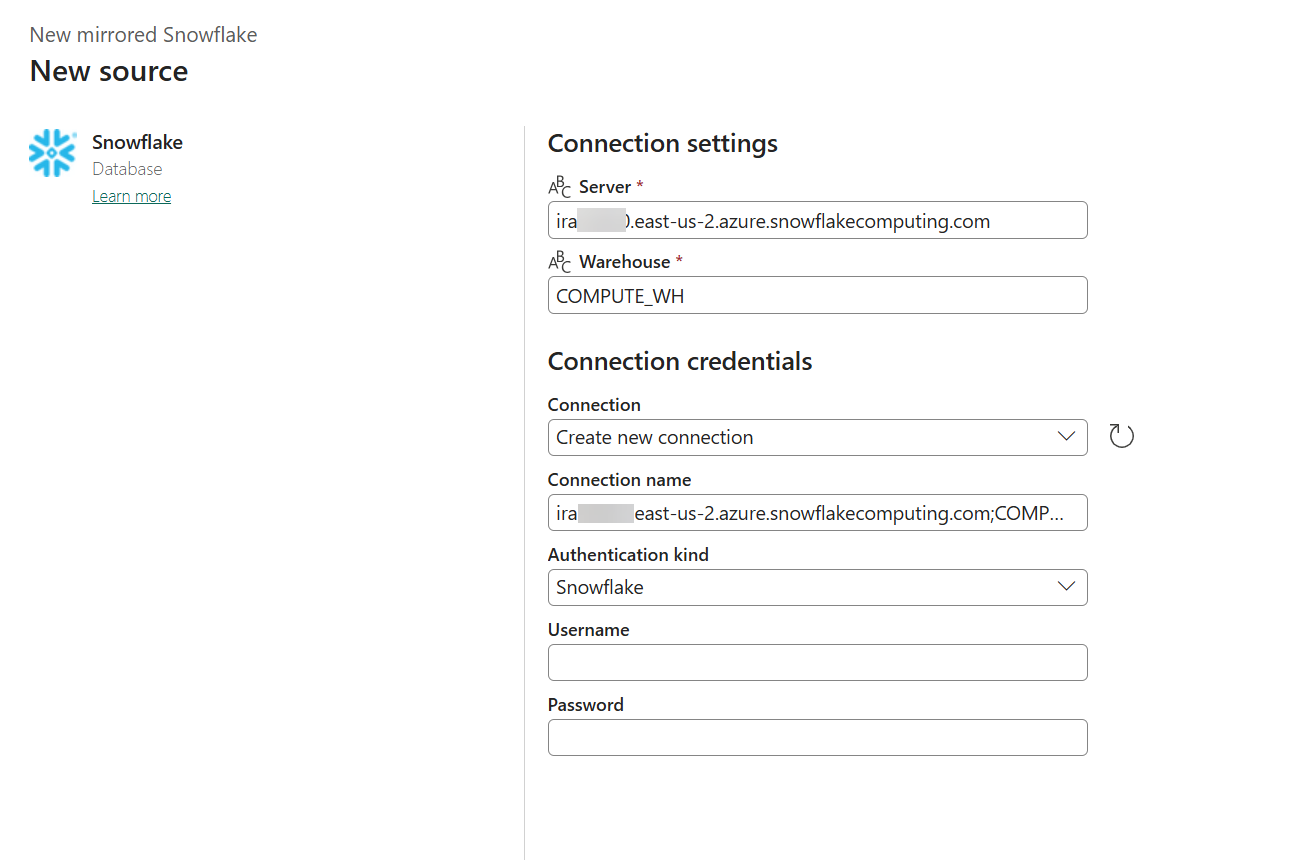
Enter the server, warehouse, and login credentials in the configuration screen and click “Connect.”
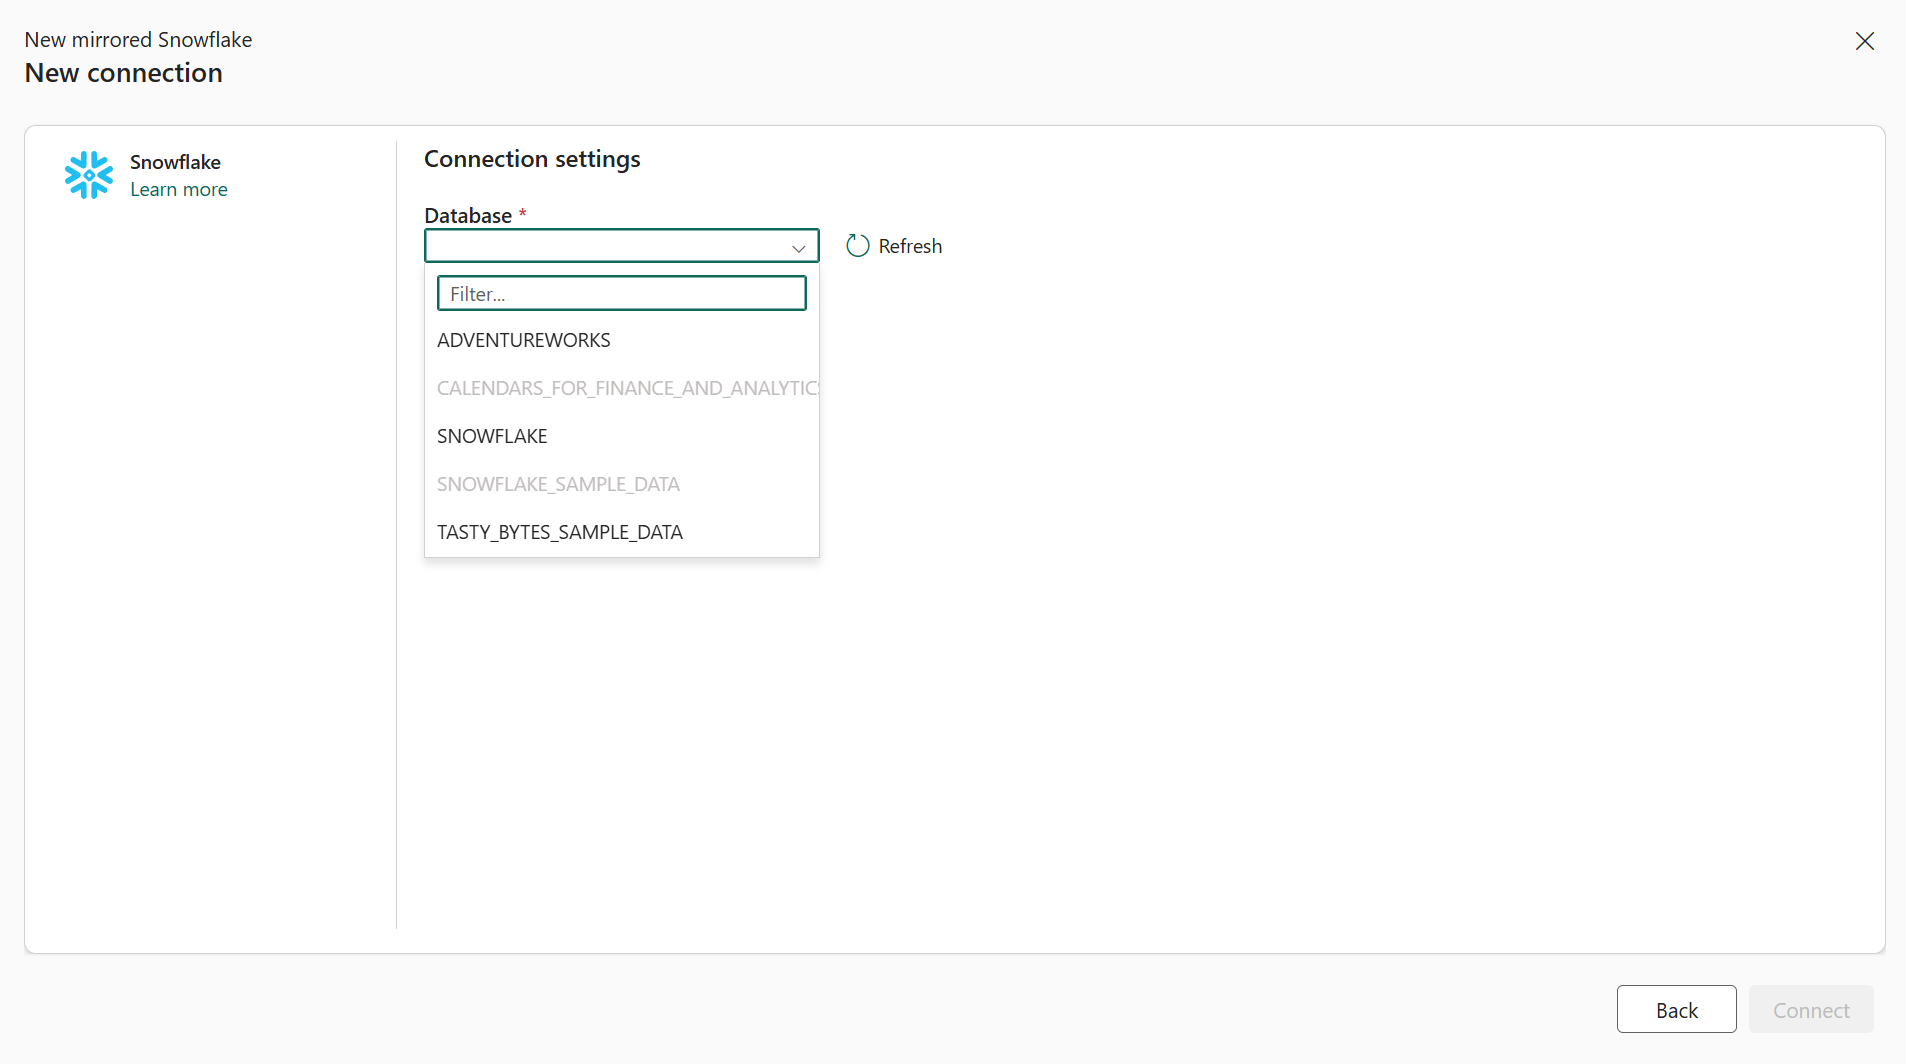
If all goes well, you’ll see a list of databases available for you to mirror in the next screen.
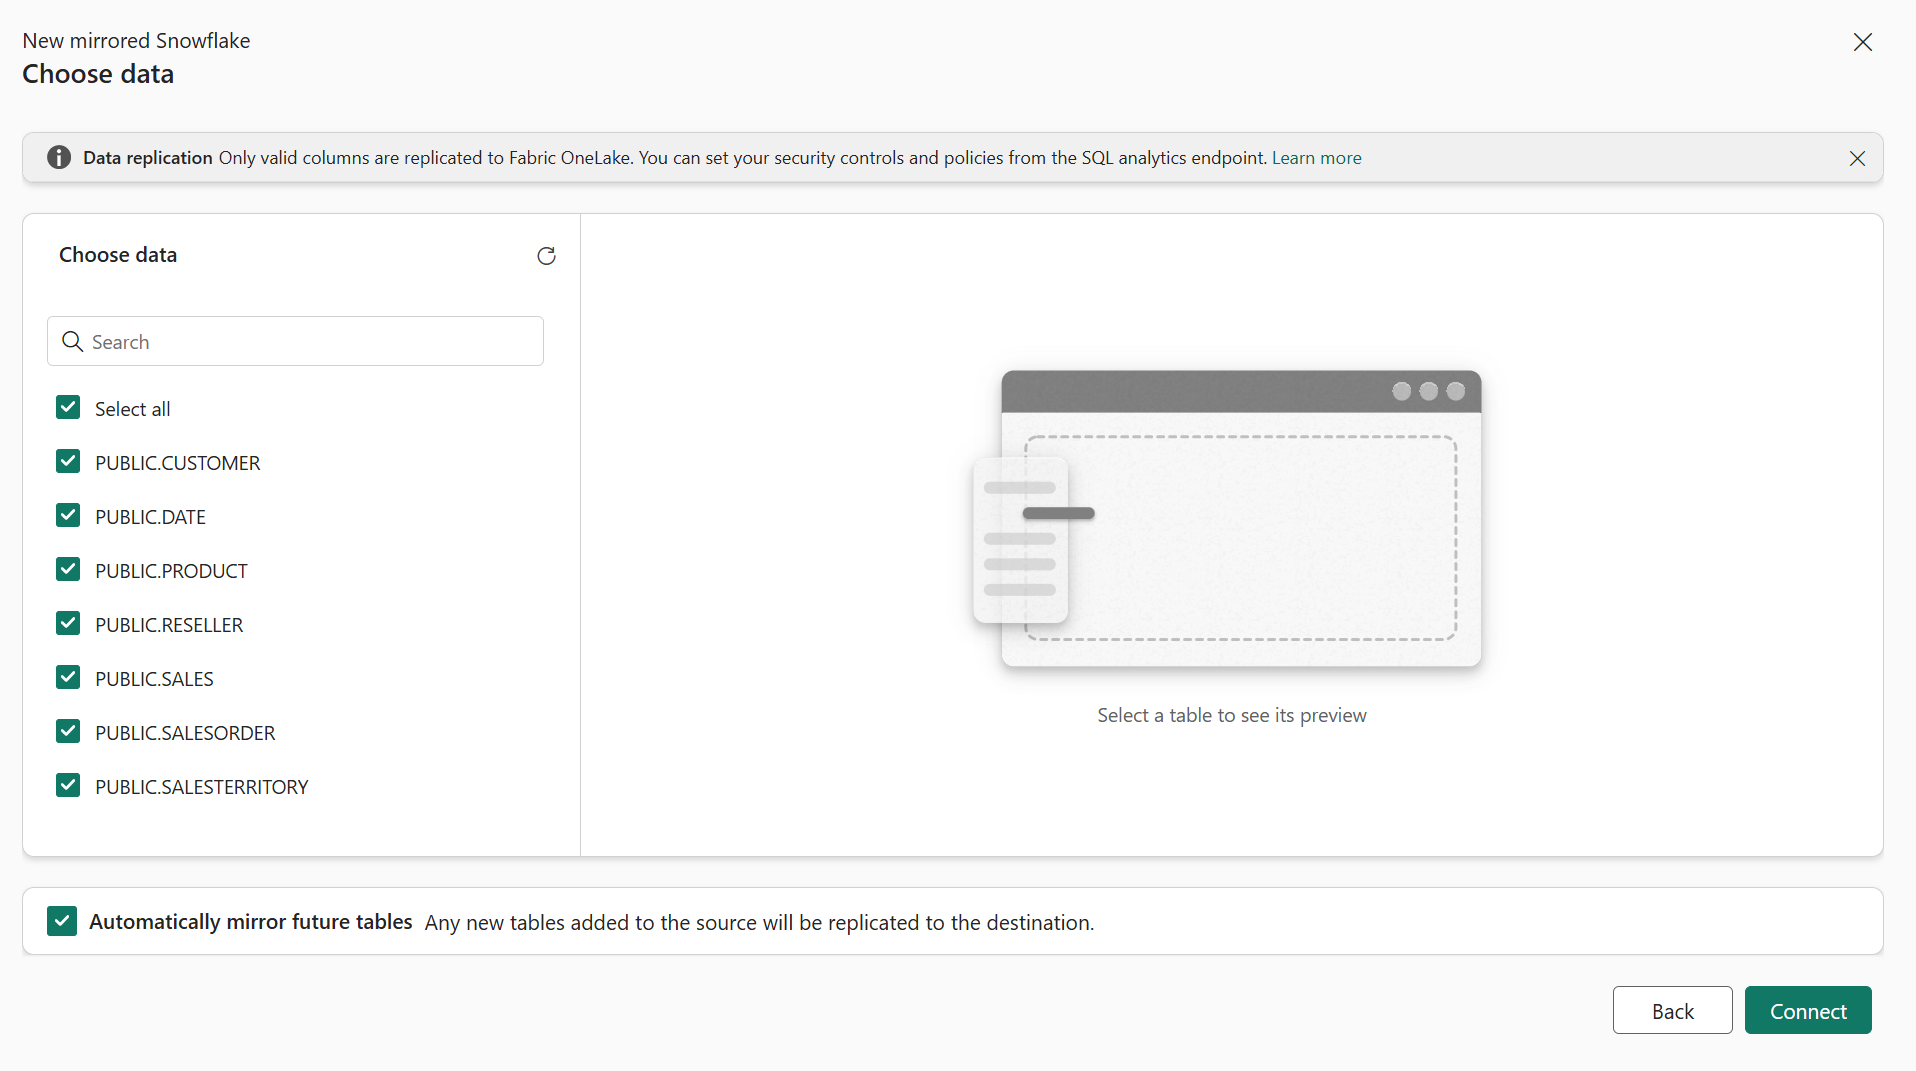
On the next screen, you can choose which tables to mirror, and whether to automatically mirror any new tables.
As long as the credentials you used in your connection have the appropriate rights, your data will start coming into the mirrored database. From there you can monitor the mirroring and start working with your mirrored data with the SQL endpoint, the default semantic model, and shortcutting to it from a lakehouse.